OpenWRT: Expand Storage Space and Memory
A Software Engineer passionate about public good projects and making technology to serve society en masse.
When using OpenWRT on relatively cheap routers, low memory and storage becomes a bottleneck, preventing you from installing a lot of packages and really unleashing the true computing power of your router. In this tutorial, we are gonna use a USB storage device (Flash Drive, Portable Hard Drive or whatever) to expand our memory. Now it’s time to get our hands dirty!
And, if you didn’t know about OpenWRT, it is a third-party after-market firmware available for many routers. (You can think of it as Cyanogenmod for Routers)
What you need
A Router with a USB port and OpenWRT 12.09-rc1 or greater installed
A USB Storage Device (Flash Drive, USB HDD, Memory cards…)
A good partitioning tool (I suggest GParted)
It’s a good idea not to use memory cards like SD or MicroSD, they are prone to read-writes and might wear out very soon.
Partitioning the storage
I am using a 4GB USB Flash Drive as my storage device. Just plug it in to your system and launch your partition manager. Remvoe previous partitions and create two new partitions.
An ext3 partition –> 3GB
A swap partition –> 768MB
Actually you don’t need that much of swap, you can allocate as much memory as you want. Just remember four things,
The ORDER is important. The ext3 should be the FIRST partition, swap should be the second one.
The ext3 one will hold your data, programs and all other stuff.
The swap partition will act as a boost of RAM.
The frequent swap read-writes WILL reduce the lifespan of your USB flash storage. (Not a problem with Hard Drives)
Mounting the device
Connect the USB Storage Device via the USB port of your router.
Login to the
OpenWRT Control Panelwith your browser.Go to
System>Mount Pointsfrom the menu. You will see your device getting detected.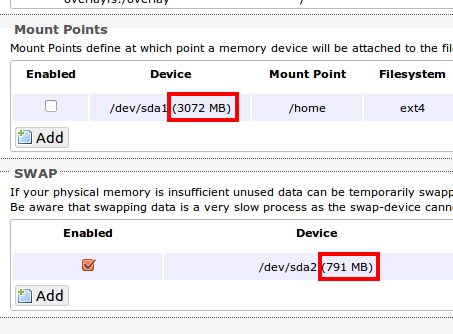
Now, click on the edit button of the
/dev/sda1device.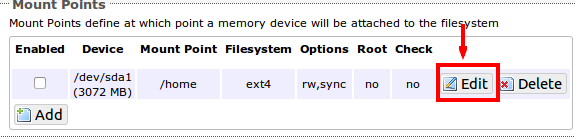
Check
Enable this mount, selectext3as theFilesystem, checkUse as root filesystemand finally clickSave and Apply.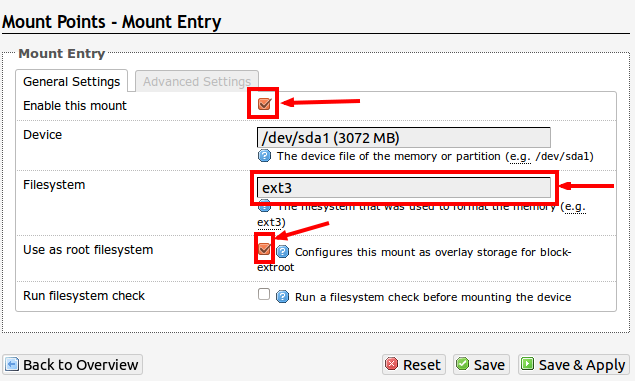
Come back to System > Mount Points, and click the
editbutton of theswappartition. CheckEnable this mountand clickSave and Apply.Now reboot the device from
System>Reboot.
Knowing if we are successful
Login to your router console via SSH.
Run the commands
df -handfree!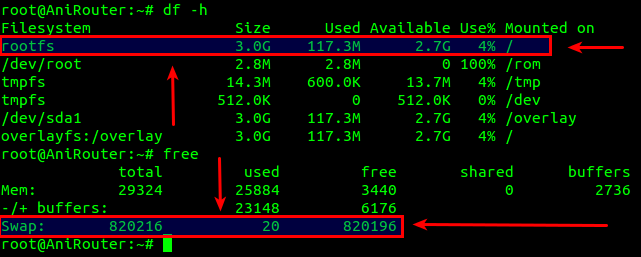
Yeppi! Now you have a boost of storage and memory ready!